How to Test Laser Pointer Power: Verify Real mW Output (With and Without an LPM)
Most laser pointers are far more powerful than their labels claim. This guide shows you how to verify actual mW output, using a laser power meter or simple at-home screening, with step-by-step protocols, NIST testing data, and a power-to-risk decision table.
Image Gallery
If you own a laser pointer and want to know its actual output, you're asking the right question. The printed label tells you what the manufacturer claimed at the factory. What arrives in your hands is often a different story.
NIST randomly tested 122 commercially available laser pointers and found that 89.7% of green pointers and 44.4% of red pointers failed to comply with federal regulations. Units labeled "<5 mW" measured as high as 66.5 mW. An Australian study of 41 consumer laser pointers found 39 exceeded 1 mW, with roughly 60% of budget samples landing solidly in Class 3B territory, and 30% arriving with no label at all.
This isn't a reason to panic. It's a reason to get informed. Most of these non-compliant units come from the unregulated budget market, no-name listings on general e-commerce platforms where specs are copied from a template and nobody tested anything. When you buy from a seller who actually meters their inventory and provides real specifications, you don't have this problem.
This guide gives you a complete verification framework: how to screen a laser pointer's power in 60 seconds without equipment, and how to measure it properly with a laser power meter. Whether you bought your laser from us or somewhere else, these methods work. Test it once, know what you have, and use it accordingly.
Key Takeaways
- 89.7% of green laser pointers in NIST testing were non-compliant, the label is a customs formality, not a safety guarantee
- You can screen a laser pointer in 60 seconds without a power meter: check the label, test for melting, watch for battery drain, and look for IR leakage signs on 532nm greens
- A proper LPM test requires warm-up time, wavelength correction, and averaging 3-5 readings, skipping these steps produces numbers you can't trust
- 532nm DPSS green lasers present a unique danger: your meter reads total power including invisible IR, but you only see the green portion
- Use the decision table at the end to translate any measured power number into a real-world risk level and safe usage recommendation
Why Labels Don't Always Tell the Truth: Test Laser Pointer Power Yourself
When you buy electronics, you expect the spec sheet to match the product. With budget laser pointers from unverified sellers, this expectation doesn't hold. The label on a cheap pointer is often a compliance sticker printed to clear customs, not a measurement from a calibrated meter.
The NIST random testing study is the most authoritative data available. Out of 122 tested pointers, only 10.3% of green units were compliant. The worst offender, labeled and sold as a standard presentation pointer, measured 66.5 mW, more than thirteen times the legal 5 mW ceiling for a device marketed as a "laser pointer" under FDA rules.
The real-world consequences are well documented. In a case on the MEETOPTICS forum, an 11-year-old child suffered permanent retinal damage from a laser pointer labeled Class II with "<1 mW." When investigators measured the device, it output 60 mW, sixty times what the label claimed.
A Reddit user who works in an atomic physics laboratory ran into a similar problem. He needed a genuine 1-5 mW laser for safe lab demonstrations. He bought a green pointer on eBay labeled "5 mW."
When he put it on his lab's calibrated power meter, it measured over 30 mW. He had to add neutral density and 532nm bandpass filters himself to bring it down to a safe level, because he couldn't find a laser that actually delivered what the label promised.
On r/electronics, a user posted a photo of a laser pointer whose "<5 mW" label sat next to the admission that the device had just melted black plastic when focused. A commenter put it bluntly: "The 5 mW label is just to satisfy a formality. The label on a cheap Asia-made pointer IS NOT A GUARANTEE!!!"
The pattern is consistent: budget, untested laser pointers rarely match their labels. This is why we measure every high-power unit we ship, the spec number on our product pages isn't a guess, it's a reading. For more on how the consumer market got this way, see our investigation of "50000mW" laser pointer scams. And for a primer on what different power levels mean in practice, read our guide to laser pointer power levels and mW ratings.
The bottom line: if you bought your laser from a reputable source that provides measured specs, you can skip half the screening steps below. If you didn't, or you're just curious, the full protocol will tell you exactly what you're holding.
Before You Test: Quick Safety Checks
Before you reach for a power meter, look for these signs. Any one of them tells you the laser is operating well above the "pointer" range, and you should treat it as a Class 3B or Class 4 device:
- It melts, chars, or visibly burns dark material within seconds. A true 5 mW laser can't melt black plastic at any focus distance. If yours can, it's well into Class 3B territory.
- The beam feels warm or stings your skin at close range. Visible laser light shouldn't produce a thermal sensation. This means output is above 50 mW.
- You feel eye discomfort or afterimages from looking at the beam spot on a wall. Even diffuse reflections from high-power lasers can exceed safe exposure limits.
- The housing gets noticeably hot within 30-60 seconds of continuous use. This is the diode dumping waste heat, typical of high-power operation, not a 5 mW pointer.
If you see any of these signs, put on proper laser safety goggles rated for the wavelength, keep the laser away from people and pets, and continue reading to learn how to confirm exactly what power you're dealing with.
60-Second At-Home Screening (No Power Meter Required)
If you don't own a laser power meter, and most people don't, you can still do a meaningful safety assessment. Here's a four-part screening that requires nothing but what you already have at home.
1. Label Sanity Check
Look at the label and ask four questions:
- Does it list a specific wavelength? A real laser label states the wavelength (e.g., 450nm, 532nm, 650nm). If the only spec is "5mW" or a vague "Class III" with no wavelength, the label was printed as decoration.
- Is there a manufacturer name or certification mark? FDA-compliant labels include a manufacturer identifier, a serial number, and a certification statement. Blanket labels with generic text like "Laser Pointer" and no traceable manufacturer are red flags.
If the label fails any of these checks, default to assuming the power is unknown and potentially hazardous.
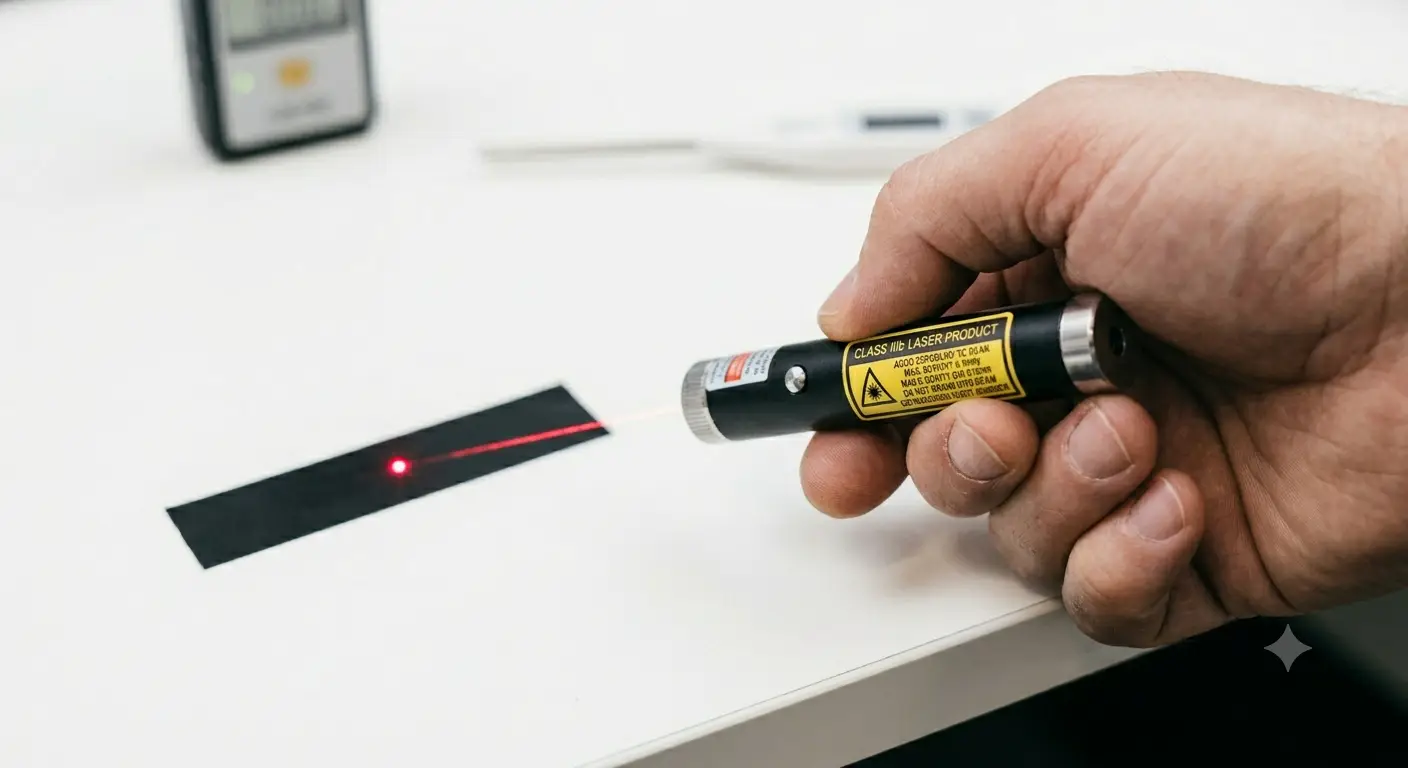
2. The Black Material Test
Dark-colored electrical tape works best for this screen. In our testing, it produces unambiguous results in seconds, if the beam starts smoking the tape within a few seconds, you are not holding a 5 mW pointer. Bring the focused beam to the tape surface at a distance of 2-3 inches and hold it steady for 10 seconds.
- No visible effect at all → the output is likely under 10-20 mW
- Slight warming detectable by touch → likely 20-50 mW
- Visible smoke or melting within 5-10 seconds → output is at least 50-100 mW; this is firmly Class 3B
- Immediate smoking or hole formation → output exceeds 100 mW; treat as Class 3B or Class 4
This is a rough thermal screen, not a measurement. But it corroborates or contradicts what the label claims, and it requires no tools.
3. Battery Drain Check
High-power laser diodes draw significantly more current than low-power units. A 5 mW red diode might draw 30-50 mA. A 1W blue diode draws 1,500-3,000 mA.
If your pointer uses a single 16340 or 18650 cell and drains a fully charged battery to unusable dimness in under 15 minutes of continuous use, it is pulling current consistent with a high-power diode, regardless of what the label says. Our battery voltage and brightness guide explains the current demands of different power levels.
4. Green Laser IR Leakage Quick Screen
532nm green laser pointers use DPSS (Diode-Pumped Solid State) technology: an 808nm infrared pump diode fires into a crystal set that converts a portion of the IR into visible 532nm green.
Cheap DPSS modules often omit the IR-blocking filter, meaning a large fraction of the output is invisible infrared radiation that your eyes cannot see but a power meter would register.
On the BudgetLightForum, one user tested multiple Chinese "1000mW" green laser pointers. The most powerful unit delivered only 240 mW of visible green light. The remaining 760 mW was invisible, unfiltered IR radiation, the kind that causes retinal damage without triggering your blink reflex because you cannot see it.
Quick infrared leak indicators without an IR filter:
- The beam burns or melts material despite looking visually dim
- The laser housing near the aperture gets warm quickly during use
- The laser was purchased for under $30 and claims to be a 532nm green above 50 mW
If any of these apply, assume significant IR leakage until you can verify with proper equipment.
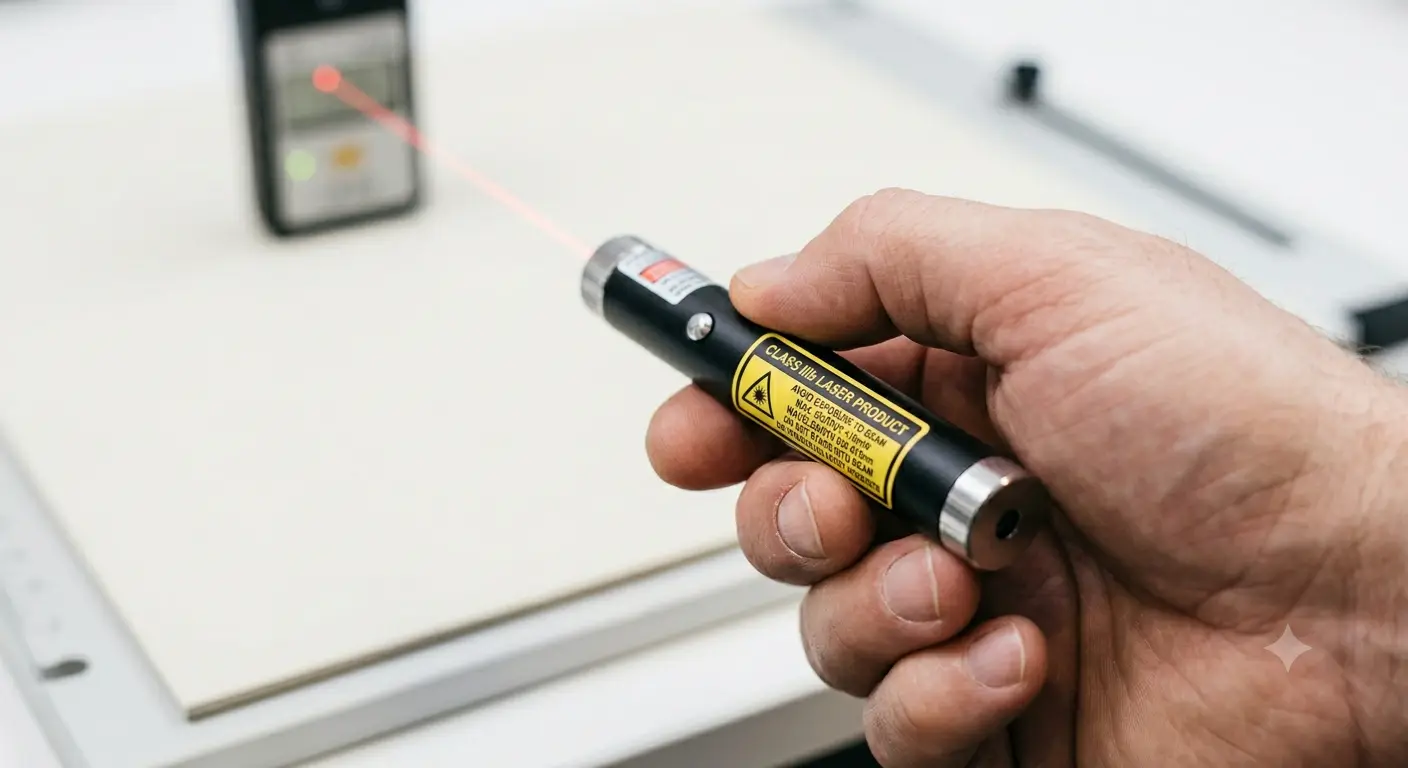
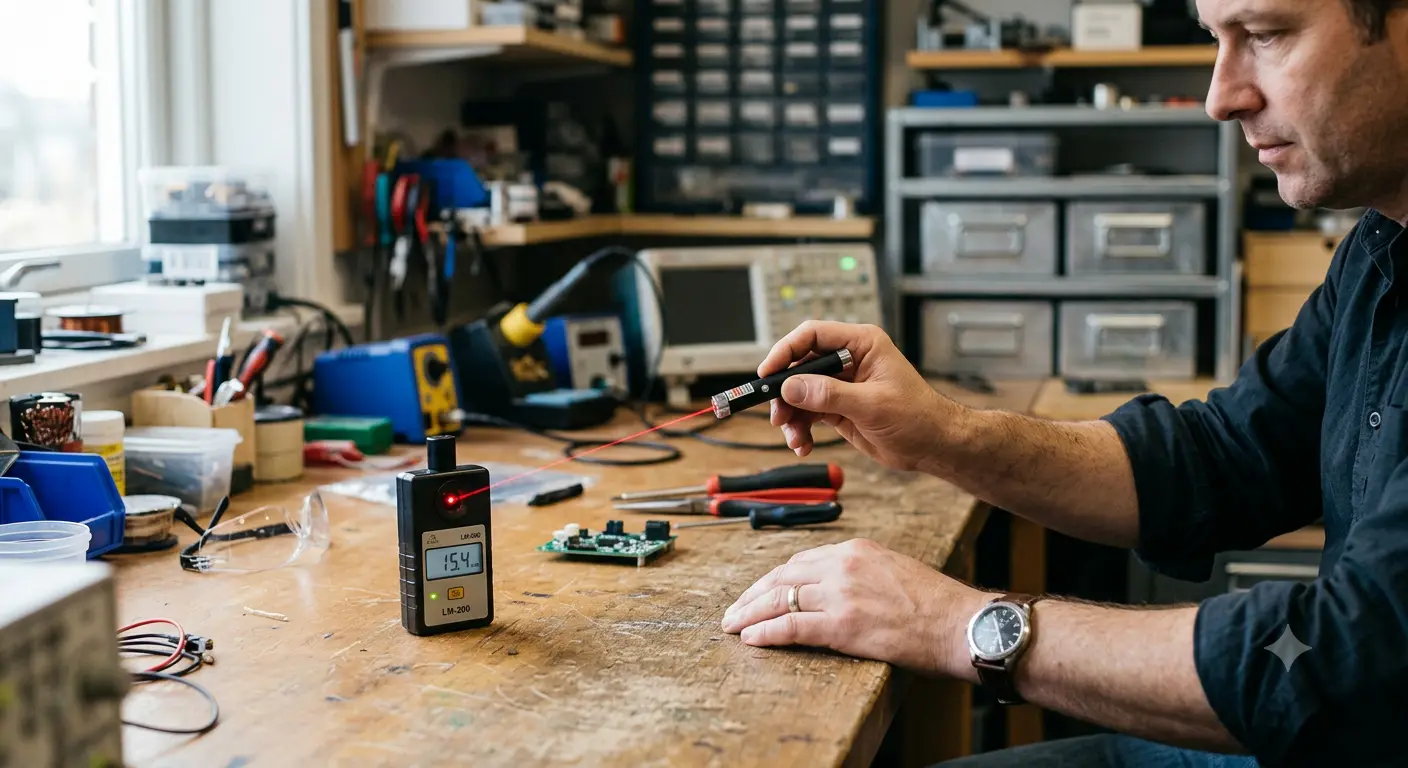
How to Test Laser Pointer Power with an LPM: Step-by-Step Protocol
If you have access to a laser power meter, or are considering buying one, follow this testing protocol. These steps come from professional measurement standards and the documented practices of experienced enthusiasts on Laser Pointer Forums and BudgetLightForum. Skipping or rushing any step can produce readings that are 20-40% off from true output.
Choose the Right Meter Type
| Meter Type | Best For | Limitations |
|---|---|---|
| Thermopile | Handheld lasers 50 mW to 10W | Slow response (5-20s to stabilize); reads total power including IR |
For testing consumer laser pointers, especially high-power handhelds, a thermopile meter is the more practical choice. The Sanwu Tracer Mini 10W (approximately $165) is one of the only meters explicitly designed for laser pointer enthusiasts, featuring USB-C charging, Bluetooth data logging, and a built-in thermopile sensor. Professional options from Coherent and Gentec-EO start at $560 and go past $1,200, but the enthusiast-grade meters are adequate for consumer verification.
Pre-Measurement Setup
Charge the battery fully. A laser running on a partially depleted battery will output less power. This is not a minor effect. On resistor-limited drivers common in cheap pointers, output can drop 30-50% as battery voltage sags. If you are testing to determine maximum output, you need a fully charged cell.
Align the beam to the sensor center. The entire beam spot must land within the active area of the sensor head. A beam that partially misses the sensor will produce falsely low readings. Most thermopile sensors for handheld use have a 10-20mm diameter active area, check your meter's specification.
Let the laser warm up for 30 seconds before recording. DPSS green lasers in particular have a thermal stabilization period. The crystal set needs to reach thermal equilibrium before the output stabilizes. Taking a reading immediately after power-on will capture a transient value that may not represent sustained output.
The Reading Protocol
-
Set your meter to the correct wavelength. Thermopile meters are relatively wavelength-flat across the visible spectrum, but photodiode meters require wavelength correction. A meter set to 450nm that measures a 532nm laser will report the wrong value.
Common Measurement Errors
Battery sag mid-test. If you are taking multiple readings without recharging, output will decline across the test session. This is real output decline, the laser is getting dimmer, but it means your averaged number represents an unknown mix of battery states. Recharge between test sessions or note the battery voltage for each reading.
Sensor too small for the beam. Some handheld lasers have a beam diameter of 5-8mm at close range. If the sensor aperture is smaller than the beam, you are measuring a fraction of the output. Use a sensor with at least 10mm active diameter for handheld lasers.
Ambient light contamination. Thermopile sensors respond to any thermal radiation, not just laser light. Direct sunlight, incandescent bulbs, or even body heat near the sensor can offset readings. Shield the sensor from stray light and heat sources during measurement.
The Green Laser Trap: Visible Output vs. Total Power (IR Leakage)
This is the most important section for anyone who owns a 532nm or 520nm green laser pointer, like our Compact Green Laser 1.5W 520nm which uses direct-diode technology to avoid the IR leakage problem entirely. It is also the concept that almost no consumer-facing article explains.
Laser enthusiasts keep getting surprised by dangerous devices they thought were safe because the power number they see on a meter does not match the visible brightness their eyes perceive.
A 532nm DPSS green laser works like this:
- An 808nm infrared pump diode fires into a Nd:YVO₄ crystal
- The crystal converts 808nm IR into 1064nm IR
- A KTP frequency-doubling crystal converts a portion of the 1064nm into 532nm green
- In a properly built laser, an IR-blocking filter sits after the KTP crystal and blocks the residual 808nm and 1064nm IR
- In a cheap laser, that filter is often omitted to save $0.50
When the IR filter is missing, your laser is outputting a mix of visible green and invisible infrared. Here is the critical point: a thermopile power meter registers total optical power, it cannot distinguish between visible 532nm and invisible 808/1064nm. The meter says "760 mW" and you think you have a powerful green laser. In reality, you might have 240 mW of visible green and 520 mW of invisible IR, exactly what the BudgetLightForum user discovered when testing Chinese "1000mW" DPSS units.
This is dangerous because IR does not trigger your blink reflex. Your eye perceives the visible 532nm green as moderately bright. Meanwhile, the invisible IR component is depositing thermal energy into your retina without any warning signal.
How to Detect IR Leakage
With proper equipment: Place an IR-blocking filter (also called a "cold mirror" or "hot mirror," depending on configuration) between the laser and the sensor. Take one reading without the filter (total power = green + IR), then one with the filter (visible green only). The difference is the IR component.
Without an IR filter: If you have any suspicion of IR leakage, the beam burns despite looking dim, the laser was under $30, or it claims to be a high-power green, treat the measured power as if a significant fraction is invisible IR. Do not trust your eyes to judge safety based on visible brightness alone.
The NIST testing lab documented this exact issue in their 2013 study on green laser pointer hazards. They built a test bed using approximately $2,000 in off-the-shelf components to separately measure visible output and IR leakage, underscoring that even professional verification requires dedicated equipment.
What Your Measured Laser Pointer Power Means: Decision Table
You have a number. Now you need to know what to do with it. The table below translates measured output into practical decisions, based on FDA regulations, MIT EHS laser safety guidelines, and community safety consensus.
For 532nm green DPSS lasers, add this check:
- Meter reads X mW total → estimate visible component based on price tier: sub-$30 likely 30-50% visible; $50-100 likely 60-80% visible; premium units with advertised IR filters likely 90%+ visible.
- If IR leakage suspected → upgrade the risk assessment by one tier. A green laser measuring 40 mW total might only deliver 20 mW visible, but the 20 mW IR component is invisible and carries the same retinal hazard.
The FAA reports 12,840 laser strikes on aircraft in 2024 and 10,993 in 2025, with single civil penalties reaching $11,000 per incident. If your measured output exceeds 5 mW, you are no longer holding a "pointer" in any regulatory sense, you are holding a device that can ground aircraft and cause federal charges. Lasers like our 7W Blue Single Beam unit operate in a category where testing and safety protocol are not optional.
What to Do If Your Laser Measures Higher Than Expected
If your measurements or screening confirm the laser exceeds its labeled power, here's what to do:
Recalibrate how you use it. That presentation pointer you bought for the conference room? If it's above 5 mW, use it outdoors only. The cat toy? Put it away, pets can't wear safety goggles. The astronomy star pointer? Be certain the beam path never intersects with aircraft flight paths.
Label it with the actual measured class. Put a piece of tape on the laser with the real power and class. The next person who picks it up, a guest, a family member, a curious kid, needs to see that information.
Request a refund if it was sold under false specs. On platforms like Amazon and eBay, you can report listings for selling mislabeled laser products. The FDA states that lasers sold as "pointers" above 5 mW are illegally marketed.
If you keep the laser, get proper safety goggles. Standard sunglasses won't block laser wavelengths. You need goggles rated for the specific wavelength and with the right optical density for the power level. For Class 3B or Class 4, OD 4+ is the minimum. Our laser safety glasses guide walks through wavelength matching, OD selection, and certification standards.
And next time you're in the market: buy from a seller who actually tests what they ship. It saves you all of the above.
Conclusion
The laser pointer market has a labeling problem. NIST found nearly 90% of green pointers are non-compliant. Academic researchers, hobbyist forums, and government labs all confirm the same pattern: budget, untested lasers rarely match their printed specs.
But this is a fixable problem. You have three levels of defense:
- Immediate screening, 60-second checks you can do right now with no equipment
- LPM measurement, the step-by-step protocol for getting a real power number
- The decision table, translating any measured value into practical guidance
We test every unit we ship. Our bench has a laser power meter running daily because we believe the spec on the product page should match the laser in your hand. If you're shopping for a laser you can trust without having to verify it yourself, our Nichia Precision Blue Laser 4W delivers stable, measured output with a diode known for consistent power across its duty cycle. For green laser enthusiasts, our Compact Green Laser 1.5W 520nm uses direct-diode technology, no DPSS crystal, no IR leakage to worry about. And if you need the most versatile option with adjustable focus and verified power specs, the Professional Focusing Laser 4W/2W has been one of our most consistently-rated performers.
Knowing what you're holding changes how you use it. Test your laser, label it honestly, and protect your eyes. That's not paranoia, it's what responsible ownership looks like.
Frequently Asked Questions
Frequently Asked Questions
How do I test a laser pointer's power without buying a power meter?
Use the four-part screening method: check the label for manufacturer, wavelength, and proper classification markings; test whether the focused beam melts black electrical tape (melting within 10 seconds indicates at least 50-100 mW); monitor battery drain rate (a battery that dies within 15 minutes points to high current draw); and for 532nm green lasers, look for IR leakage signs like burning despite dim visible output. These screens cannot give you a number, but they reliably flag dangerously overpowered units.
Can a true 5 mW laser pointer melt black plastic?
No. A genuine 5 mW laser cannot melt black plastic at any focus distance, regardless of how long you hold it in place. If your laser melts electrical tape, chars dark material, or produces visible smoke, its actual output is at least 50-100 mW, placing it firmly in Class 3B territory. This is the single most reliable at-home screening test.
Why do cheap 532nm green lasers have IR leakage?
DPSS green lasers use an 808nm infrared pump diode whose output passes through two crystals to produce 532nm green. A proper IR-blocking filter after the crystal set costs approximately $0.50 to include. Many budget manufacturers omit this filter entirely. The result: your laser outputs a mixture of visible green and invisible infrared, and a standard thermopile power meter reads the sum of both, giving you a misleadingly high "green power" number that includes dangerous IR you cannot see.
What power meter is best for testing consumer laser pointers?
For enthusiast use, a thermopile meter like the Sanwu Tracer Mini 10W (approximately $165) is adequate and one of the few meters specifically marketed to laser pointer hobbyists. For professional verification, Coherent LaserCheck ($560) handles low-power measurement well, and Gentec-EO PRONTO units ($1,200+) offer NIST-traceable calibration. Avoid the sub-$50 "laser power meters" sold on general e-commerce platforms, these are typically photodiode sensors with no calibration, no wavelength correction, and accuracy too poor to be useful for safety assessment.
At what measured power should I stop using a laser as a presentation pointer?
If your laser measures above 5 mW total output, it should not be used as a presentation pointer. FDA regulations define a laser pointer as a device that is "limited to 5 mW" for pointing and demonstration purposes. MIT EHS guidelines go further, recommending that presenters avoid green lasers above 1 mW due to their higher perceived brightness and the risk of IR leakage in DPSS units.