Laser Pointer Mounts & Brackets Guide: Telescope, Tripod & DIY Finders
How to mount a laser pointer on your telescope, tripod, or DIY setup. Covers the compatibility triangle (body diameter, mount interface, switch type), cold-weather reliability, the switch logic problem, and when a mounted laser is the wrong tool for the job.
Image Gallery
JimStan broke his neck in a car accident. Before the injury, he used a traditional finder scope on his telescope, craning his neck at awkward angles, as every amateur astronomer does. After the accident, those angles became physically impossible. His solution: a mounted green laser pointer. "I can usually find something almost as quickly," he wrote on Stargazers Lounge. The bracket wasn't a gadget. It was the difference between observing and quitting.
Most people asking "how do I mount a laser on my telescope" aren't dealing with spinal injuries. But the underlying problem is the same: you can't hold a laser steady, press a button, slew the scope, and look through the eyepiece at the same time. The right bracket solves this. The wrong one, which is what most people buy on the first try, leaves you holding a janky button-holder with frozen fingers, wondering why your $15 Amazon laser stopped working at 55 degrees.
Key Takeaways
- The compatibility triangle determines whether a bracket works: your laser's body diameter (in mm) × your telescope's mount interface (finder shoe/dovetail/Picatinny/1/4-20) × your laser's switch type (momentary button/constant-on collar/pressure switch). Get any one wrong and the bracket is useless. For the full accessories ecosystem including batteries, chargers, and cases, see our laser pointer accessories guide
Why Mount a Laser? The Three Real Reasons
Walk through any astronomy forum and you'll see the same debate play out: laser pointer vs Telrad vs red dot finder vs finder scope. The answer depends on what problem you're trying to solve.
Speed
A properly aligned mounted laser gets you on target before a finder scope is even in focus. You look up, see the beam terminated on the sky, and know exactly where the scope is pointing. Cloudy Nights user markb, who uses a pistol-style laser with micrometric adjustments, reports putting "planet or star in the field at 200x virtually every time", a speed that optical finders cannot match because they require you to switch between naked-eye sky and magnified finder view.
Ergonomics
This is the reason forum posts rarely mention but that matters most in practice. Refractors and Newtonians put the eyepiece at awkward heights and angles. A right-angle finder scope helps, but a laser lets you aim without touching your face to anything, you align the beam, glance through the eyepiece, and the target is there.
Outreach and Teaching
At public observing events, a laser beam shows everyone in the group exactly where the scope is aimed. The Astronomical League's official guidance specifically notes this use case: a 5mW green laser is adequate for solo or small-group pointing. A peer-reviewed study published in Optometry and Vision Science confirmed this: 23 observers in light-polluted urban conditions chose a global average of 2.38 mW, with 22 out of 23 selecting between 1.37-3.53 mW. For large groups, the Astronomical League suggests 10-25mW, though this enters a legal gray zone. Our Elite 520nm Green Laser B030 at 520nm direct-diode output offers the cold-weather stability that DPSS-based green lasers lack, making it a strong candidate for mounted astronomy use.
The Compatibility Triangle: Body Diameter, Mount Interface, and Switch Type
Here is the question no product page answers: "Will this bracket fit my laser on my telescope with my switch?" The answer requires matching three independent variables. Miss any one, and the bracket sits in a drawer. The Agena bracket specifies 21mm inner diameter. The Lumicon maxes at 23mm. The generic Amazon bracket claims 5-38mm, but a Cloudy Nights user captured the real-world gap: "I need a bracket for holding my 0.5 inch diameter GLP. I want six screws for this (three in front and three in back)." The generic bracket's oversized screws leave thin pen-style lasers with no repeatable alignment, a problem that six-point contact rings solve but budget products skip.
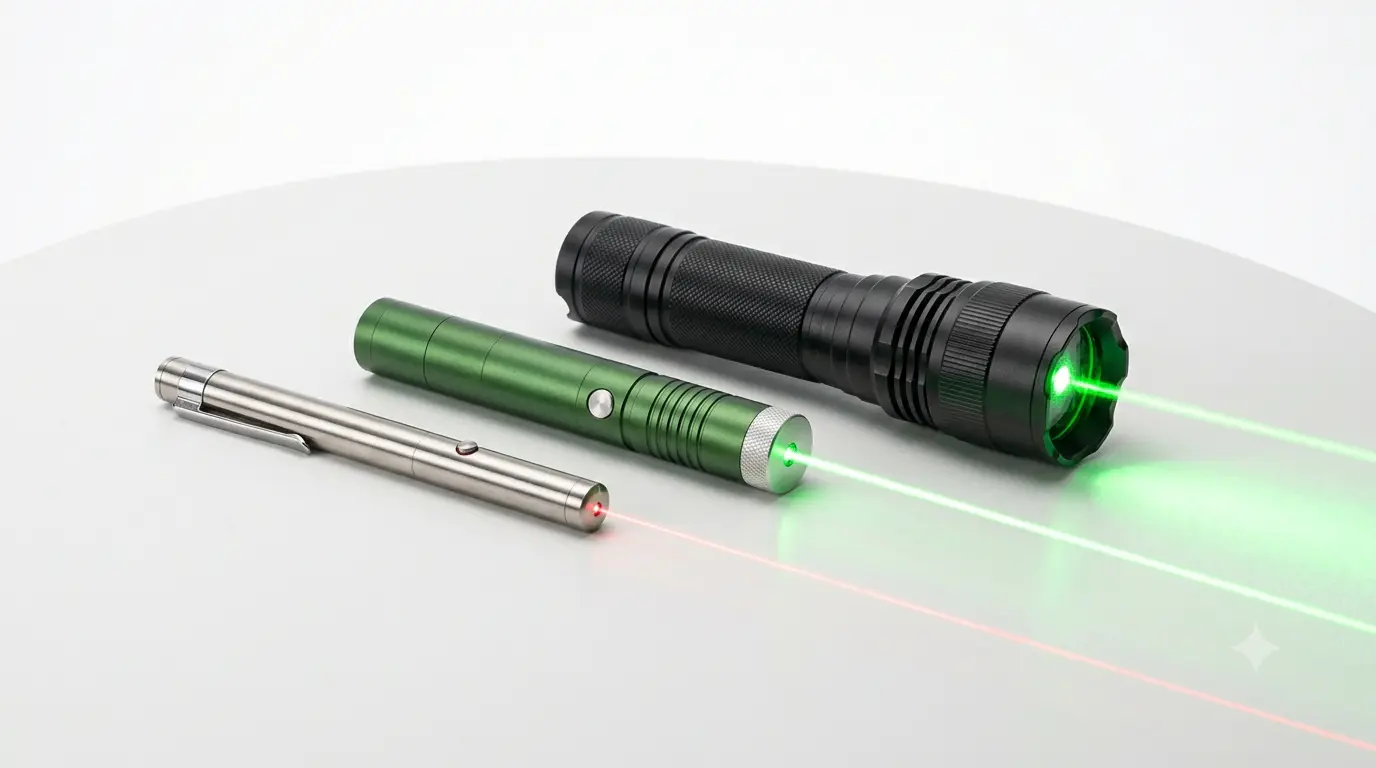
Variable 1: Your Laser's Body Diameter
Laser pointer bodies span from 0.5-inch pen-style tubes to 1-inch flashlight-style hosts with substantial heatsinking. A bracket designed for a 23mm body will not clamp a 12mm pen laser, and a bracket with a 5-38mm listed range will technically grip both but with zero repeatable alignment, because the screws over-travel on thin bodies.
| Your Laser's Body Diameter | Bracket Models That Fit |
|---|---|
| 0.5 inch / 12-15mm (pen-style) |
A Cloudy Nights user put the compatibility problem bluntly: "I need a bracket for holding my 0.5 inch diameter GLP. I want six screws for this (three in front and three in back)." Six-screw alignment rings are not a standard feature on budget brackets, but they should be for thin-body lasers that are inherently harder to align.
Variable 2: Your Telescope's Mount Interface
Your telescope has one of these, knowing which one determines your entire bracket selection path:
The most painful version of this problem: you buy a dovetail bracket, then discover your Dobsonian has no finder shoe, only two holes drilled by a previous owner in a position you don't recognize. This is so common that the Cloudy Nights beginner forum has a dedicated thread for "makeshift laser pointer mount" workarounds.
Variable 3: Your Laser's Switch Type
This is the variable that forum users complain about the loudest, and that product pages describe the least accurately.
One Reddit user on r/telescopes captured the frustration exactly: "I am tired of holding down the button while I slew my dob around, and I don't want to use one of those janky button holder things." He had escalated from $15-20 cheap lasers to a $100 budget, just looking for a reliable constant-on mechanism. Another user added: "Many lasers on Amazon advertise this feature, but so far, I haven't found one that is telling the truth."
The Orion bracket's on/off collar is the simplest off-the-shelf solution, it physically holds a momentary tail button in the pressed position. If you already own a laser with a momentary switch, a bracket with a collar is cheaper than buying a new laser. If you're buying a laser specifically for mounted use, look for a constant-on tail click, or consider the tactical/gun-sight route, which naturally includes pressure switches and windage/elevation adjustments.
Mount Interface Breakdown: Finder Shoe, Dovetail, Picatinny, Tape, 1/4-20, 3D Print, Finding Your Laser Pointer Bracket
Each mounting method has a different failure mode. Choose based on what's on your telescope today, not what would be ideal if you drilled holes.
Finder shoe / Synta base: The standard on most commercial telescopes. Slide-in dovetail foot, usually with a thumbscrew to lock. The Orion bracket and Agena bracket both use this interface. Alignment is not perfectly repeatable after removal, expect to re-sight each session.
T-style dovetail / quick-release: Found on the Lumicon Refractor bracket. The key advantage: you can remove the bracket between sessions and it returns to the same alignment when re-mounted. This is worth the extra $20-30 if you travel to dark-sky sites or share one bracket between two scopes.
Industrial double-sided tape: The Lumicon refractor base ships with industrial-strength tape for scopes with no mount points. A Cloudy Nights user articulated the hesitation perfectly: "I do not want to drill screw holes into the telescope and prefer not to use tape for attaching the bracket." The tape solution is structurally sound for a lightweight laser bracket, but the psychological barrier of sticking something to an expensive OTA is real. If you go this route, use the tape on a removable tube ring, not directly on the tube.
Picatinny / Weaver rail adapter: The tactical crossover. Cloudy Nights user kroum mounted a short rail on his SVBONY 80ED refractor using existing threaded holes, then attached a green laser gun sight. The advantage: gun sights come with built-in windage and elevation turrets, you adjust the laser's aim mechanically, not by shimming the bracket. The Reddit user Sunsparc did the same on his scope with a Pinty laser and 3M adhesive. His alignment was initially "way off in terms of sighting," but after mechanical adjustment, targets appeared "dead center in the eyepiece."
1/4"-20 tripod mount: Mostly for non-telescope setups, mounting a laser on a photography tripod for alignment, presentation, or independent pointing. The Hotech AstroAimer G3 includes a 1/4"-20 threaded hole and a ball-and-socket V-Mount for finderscope rail clamping, the most flexible single-laser solution at the premium end.
3D printed custom mount: A Reddit user posted a low-profile 3D printed holder custom-designed to his laser's exact body diameter. Another user in the same thread offered STL files for the community. This is the solution when your laser's body diameter, button position, and telescope tube radius don't match any commercial bracket. The barrier to entry is low: design or download an STL, send to a print service, out-of-pocket cost under $20.
Cold-Weather Reality: Why Cheap Lasers Give Up at 50°F
The most common mounted-laser failure has nothing to do with the bracket. It's the laser itself, specifically, the green DPSS (diode-pumped solid-state) laser, giving up in the cold. And "cold" means something different to a crystal than it does to a human.
A Reddit user on r/telescopes shared the authoritative field report: "Totally reliable to 14°F. The cheap ones will make you crazy." Another club member reported that his laser "won't work below 60." Others in the thread confirmed failure at 50°F and 55°F. These are not Arctic temperatures, they're typical spring and fall observing nights across most of North America.
The failure has two layers. First, alkaline and low-quality lithium batteries lose voltage as temperature drops, a battery delivering 3.7V at room temperature may sag to 2.8V at 40°F, below the DPSS pump diode's threshold. Second, the KTP crystal in a green DPSS laser has a narrow temperature window for efficient frequency doubling. Outside that window, green output drops to near zero even if the pump diode is running. A Reddit user described the exact failure mode: "Totally reliable to 14°F. The cheap ones will make you crazy." Another club member confirmed his laser "won't work below 60", not at arctic temperatures, but on a mild spring evening. For the full degradation timeline of laser components in adverse conditions, see our laser pointer lifespan guide.
The solution on the laser side: use lithium primary CR123A cells rated to -40°C, or Energizer Ultimate Lithium AA/AAA cells for pen-style lasers. Our laser pointer battery guide covers cold-weather cell selection in detail. The solution on the bracket side: the ADM LZR-532KIT ships with a laser that's explicitly tested in below-freezing conditions, and the Hotech AstroAimer G3 is waterproof, which helps because condensation inside a cold laser housing is a secondary failure vector. The 3X and 5X beam expanders compatible with this mount give the G019 Professional Focusing Laser even greater pointing precision at long range, ideal for mounted telescope use where every arcminute of beam divergence matters.
One contrarian voice on Stargazers Lounge argued: "A good way to use a laser is not to put it on a bracket where it soon dies of cold but to keep it in your pocket." Take the laser out, sight, observe, put it back in your pocket. This works if your observing session involves occasional pointing. If you're star-hopping across the sky for an hour, you need the cold-rated hardware.
Budget, Mid-Range, Premium: Laser Pointer Bracket Models Compared
If you already own a laser and just need a bracket: start with the Orion ($50-65) for the on/off collar, or the Lumicon Refractor ($45-55) if your scope has a T-dovetail and you care about quick-release repeatability. The Lumicon's T-style dovetail is specifically designed to hold alignment when removed and re-mounted, unlike standard finder-shoe brackets that drift after each removal and require re-sighting. If you're starting from zero: the ADM LZR-532KIT ($90-100) bundles a cold-tested laser with a bracket and charger, it's the lowest-risk path to a working setup on the first try. For astronomy-specific laser selection criteria including wavelength and beam visibility, see our complete stargazing laser guide.
DIY vs Buy: 3D Prints, Gun Sights, and the $3 Conduit Hanger Laser Pointer Mount
If the commercial bracket table above doesn't match your exact laser-telescope combination, you have three DIY paths.
3D printed holder: A Reddit user designed and printed a low-profile bracket custom-fitted to his laser body diameter and tube radius. Another user offered STL files freely. Printables hosts telescope-mounted laser pointer STL files. Send the design to a print service and the total cost runs $15-25, cheaper than any commercial bracket, and it fits perfectly because it was designed for your setup.
Tactical gun sight adaptation: Cloudy Nights user kroum recommends green laser gun sights for telescope use. They come in metal housings (impact-resistant, keeps alignment), have built-in windage and elevation turrets (no shimming needed), and use pressure switches or paddle switches (instant on/off without reaching for a tail button). Mount via a short Picatinny rail attached to existing threaded holes on your tube rings. This path costs roughly $40-70 for a decent green gun sight plus a $10 rail segment.
The $3 conduit hanger: The accessories pillar documented the Cloudy Nights classic: a $2 electrical conduit hanger from the hardware store serves as the clamp ring. Screw it to a $3 ball-swivel tripod head from Amazon. The combination provides angular fine-adjustment that forum users claim rivals $50-80 commercial brackets. This works best on Dobsonians with exposed tube surfaces.
When NOT to Use a Mounted Laser
Every guide tells you how to mount a laser. Almost none tell you when you shouldn't. These four scenarios are where a mounted laser is the wrong tool, and knowing this is what separates someone who's read a guide from someone who's spent a season at star parties.
Near an airport: The FAA recorded 10,993 laser strikes on aircraft in 2025, with civil penalties up to $32,646 per violation. The Royal Astronomical Society of Canada recommends no laser use within 10 km of an airport. A Reddit user on r/telescopes noted that in Canada, "even a member of an astro club can't use one within 20 nautical miles of an airport." If you live within 10 km (about 6 miles) of any airport, including small regional strips, check your local regulations before mounting anything. A Telrad or Rigel QuickFinder is safer and legal everywhere.
At a star party with astrophotographers: A mounted laser sweeping the sky will cross someone's long-exposure frame. One Reddit user reported: "We used to have some people use laser pointers in our club but it kept ruining the astrophotographers' shots, so noone does any more." The Astronomical League explicitly warns that constant-on lasers interfere with astrophotography. If you're at a mixed observing event, ask the imagers where they're pointed before activating any laser.
In cold weather without cold-rated hardware: If your laser is the kind that "makes you crazy" below 50°F, and your observing session runs past midnight when temperatures drop, a mounted laser will stop working, often mid-session, after you've already aligned it. The pocket method (laser lives in your jacket, comes out only for pointing) is the pragmatic workaround when you don't have cold-rated gear.
When a Telrad or RACI finder is actually better: On bright targets (Moon, Jupiter, Saturn), a Telrad's concentric rings are faster than a laser. On faint targets that require star-hopping, a right-angle correct-image (RACI) finder shows you the star field at 6-9× magnification, a laser can't help you hop from one invisible star to another. The laser's sweet spot is rough pointing: getting the scope into the right constellation or to within 1-2 degrees of a bright target. After that, switch to the finder scope for the final approach.
Frequently Asked Questions
What size laser pointer fits a telescope bracket?
Agena brackets accept up to 21mm body diameter; Lumicon up to 23mm; generic 5-38mm brackets technically fit everything but struggle with thin pen-style bodies. Hotech's system is built around 1-inch diameter bodies. Measure your laser with calipers before buying, this single measurement is the #1 reason brackets get returned.
Can I attach a laser to my telescope instead of a viewfinder?
Yes, and many observers prefer it. The key is matching your telescope's mount interface, finder shoe, dovetail, threaded holes, or adhesive base, to the bracket's foot. The most common setup uses a Synta/Vixen finder shoe dovetail base, which fits Celestron, Sky-Watcher, and Orion scopes. If your scope has no mount points, the Lumicon Refractor bracket includes industrial tape for a no-drill attachment.
Is a green laser better than a Telrad or Rigel QuickFinder?
Different tools for different tasks. A green laser excels at rough pointing: getting the scope into the correct constellation in seconds. A Telrad's concentric rings excel at fine pointing on bright targets. For faint-object star-hopping, a right-angle finder scope (RACI) is superior. Many experienced observers use both: a laser for the rough approach, a Telrad or finder scope for the final alignment.
Why does my green laser pointer stop working in cold weather?
The DPSS crystal used in most green lasers has a narrow temperature window. Below 50-60°F, the frequency-doubling efficiency drops dramatically. Simultaneously, battery voltage sags in cold temperatures, often falling below the pump diode's minimum threshold. The fix: use lithium primary batteries rated to -40°C, or cold-tested systems like the ADM LZR-532KIT, or keep the laser in a warm pocket between uses.
Do I need a continuous-on switch or a momentary switch for telescope use?
For mounted telescope use, you need either a continuous-on tail click (click-on/click-off, like a flashlight) OR a bracket with an on/off collar that holds a momentary button in the pressed position. Holding a momentary tail button while slewing the scope, especially with cold fingers, is the single most common complaint in forum discussions about mounted lasers.
Is it legal to use a laser pointer for astronomy?
Yes, with important restrictions. The FDA limits laser pointers (sold/ marketed as pointers) to Class IIIa / 5mW maximum in the 400-710nm visible range. The RASC recommends staying 10 km from airports. The Astronomical League notes that 5mW green is adequate for most astronomy use. The FDA's official laser pointer manufacturing guidance is explicit on this point: devices above 5mW in the visible range cannot legally be promoted as laser pointers, even though the RASC and Astronomical League acknowledge that 10-25mW may be useful for large-group outreach in light-polluted conditions. This is a real regulatory gray zone. Above 5mW, the device is Class IIIb and must include a key switch and remote interlock, features that no consumer green laser bracket setup includes.